After discussing what makes a hit game in last month’s blog post, now is a good time to create our own.
The Clone Wars project creates a Space Invaders-style game just like the 1978 classic. As the name suggests, this project introduces the concept of clones. Creating multiple copies of a sprite that behaves in the same way. It is one of the more challenging and longer projects that we do but allows plenty of tinkering and develops learners’ understanding of gameplay and how sprites interact with each other. This project is best completed over multiple sessions, but key elements can be created in a single session, which is how we approach the project in our single-day workshops.
The starter project contains a rocketship sprite on a space background. First, we need to control the rocket using key presses. Before doing this, it’s a good idea to change the backdrop to the x-y grid to introduce the concepts of position and movement using coordinates. Once we have created the blocks to move to the left, I challenge the children to move the rocket right independently.
We then come to the part of the game that all children love, making the rocket shoot. Here, the children can create their own sprite to fire from the rocket or we use the lightning sprite. This is where we first meet the concept of cloning. We only have a single lightning sprite but want to create multiple clones as they fire from the rocket. This shows the value of cloning. However, when the script runs, we notice that multiple overlapping sprites are fired consecutively, and the game looks a bit messy.
Here, children have the opportunity to examine their script and work out ways to fix the problem. It’s always great to listen to discussions as they try different ways to fix it. Invariably, someone works it out and shares their answer among the rest of the class.
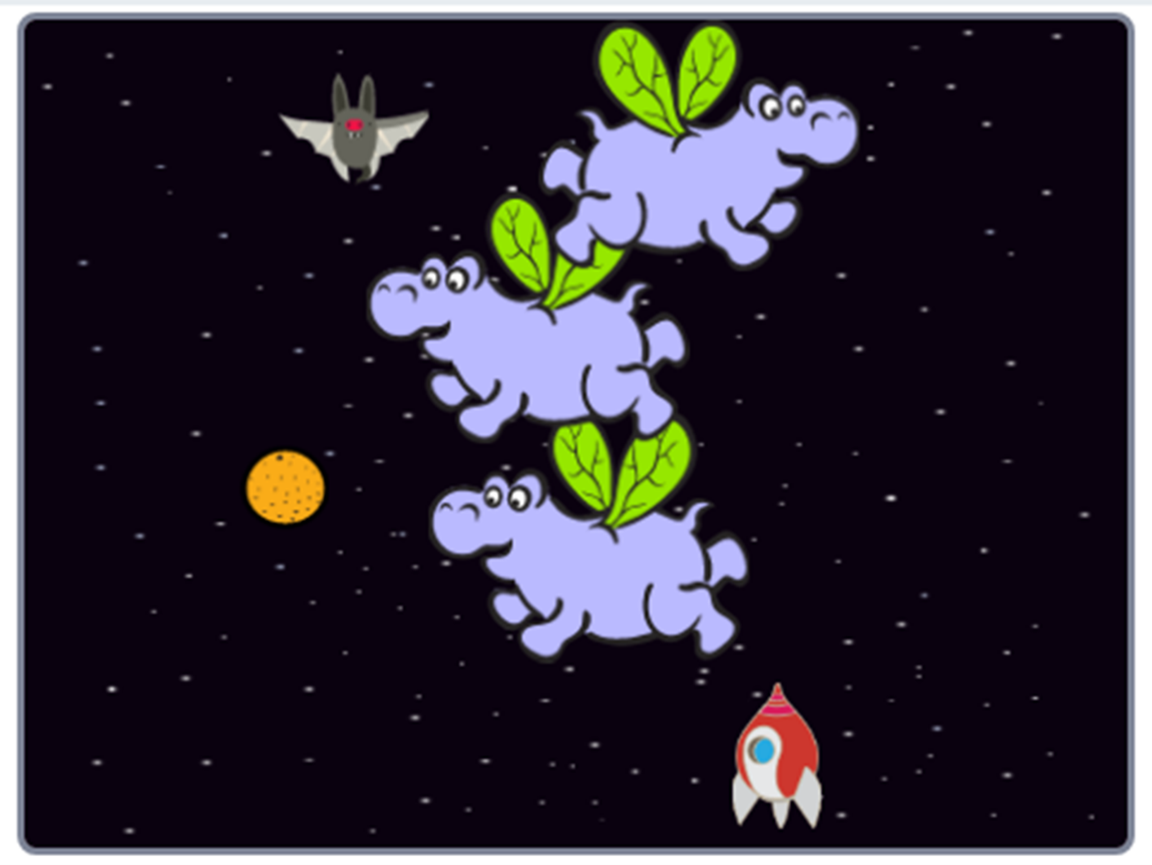
Once the lightning is fixed, the rocket needs something to shoot at. In the example, we use Space Hippos. But really, any sprite can be used as the enemy of the player, so I encourage the children to be as imaginative as they like. If you browse through the Scratch sprite library, you can see the variety of enemies that children can select from. We’ve had everything from space squirrels to flying Wotsits! This also gives children the opportunity to manipulate their new sprites to fit into the game by changing their size, orientation, rotation style and editing their appearance using the costumes tab.
The next step in the project challenges children to create a variable. This allows them to create sprites at random intervals, in random positions across the top of the screen, that move at random speeds. All of this adds up to more unpredictability, which adds to a more interesting, engaging and ultimately, more enjoyable gaming experience.
There has to be jeopardy in a game to make it interesting. Here, we want the rocket to explode when touched by enemy sprites. To do this, we need an exploded costume for the rocket sprite. In the past, we have just drawn an exploded ship. But this project shows you how to repurpose an existing sprite (in this case, the sun) to represent something else – which is always worth bearing in mind.
The next part of the project challenges the learner to create variables to record a player’s score and give lives to the player that drops each time the player is touched by another sprite. One of the downsides of this project is that if you don’t know how to do this, the answer isn’t provided straight away. So, if you get stuck at this point of the project, you can’t find the answer here. To learn how to add lives and scores, you need to download the completed code from the ‘additional notes for educators’ tab on the first page and find the corresponding scripts yourself. This issue is addressed in subsequent projects, where the answer to challenges can be found by opening a tab on the same page, but it’s definitely worth working through an entire project first before sharing it with children, just in case there are any elements that are a bit tricky where the solution isn’t provided.
When working through the project with school groups, this is usually the point that we finish. We have around two hours for the project and the children are usually ready for a break at this point. However, introducing a new enemy sprite that fires its own projectiles increases the depth of the game and adding a ‘game over’ message makes it feel like a real computer game.
The final pages of the project suggest ideas for improving the game: including health packs to gain lives and adding obstacles that the player has to avoid. I would also include music and sound effects to make the game more interesting. To develop the game further, children could include extra players, a high score, and more levels.
This is a great project to introduce the concepts of cloning and how sprites can interact with each other. It allows children to create a real game they are familiar with and can develop in multiple ways. It is a longer, more complex project but is well worth the investment.
by Steve Lewis
How can we help?
If you are looking for a Contract Electronics Manufacturing partner, submit your enquiry today and a member of our team will be in touch shortly.
Are you experiencing an issue with your Sony product? Tell us about it and our team of expert technicians will be in touch.
Are you looking for office space with fantastic amenities and 24/7 security? Enquire today with your requirements and our team will be in touch with information about our availability.
We are a socially aware business which seeks to support our local community You can submit your request today using the form on the right. Please note that we can only support requests within a 30 mile radius from our facility. Our committee reviews requests on a monthly basis, so please allow a few weeks for our team to respond.
To arrange a visit for your school as a part of our educational programs, please submit your inquiry today. Our committed team will respond with guidance regarding availability within a week.